

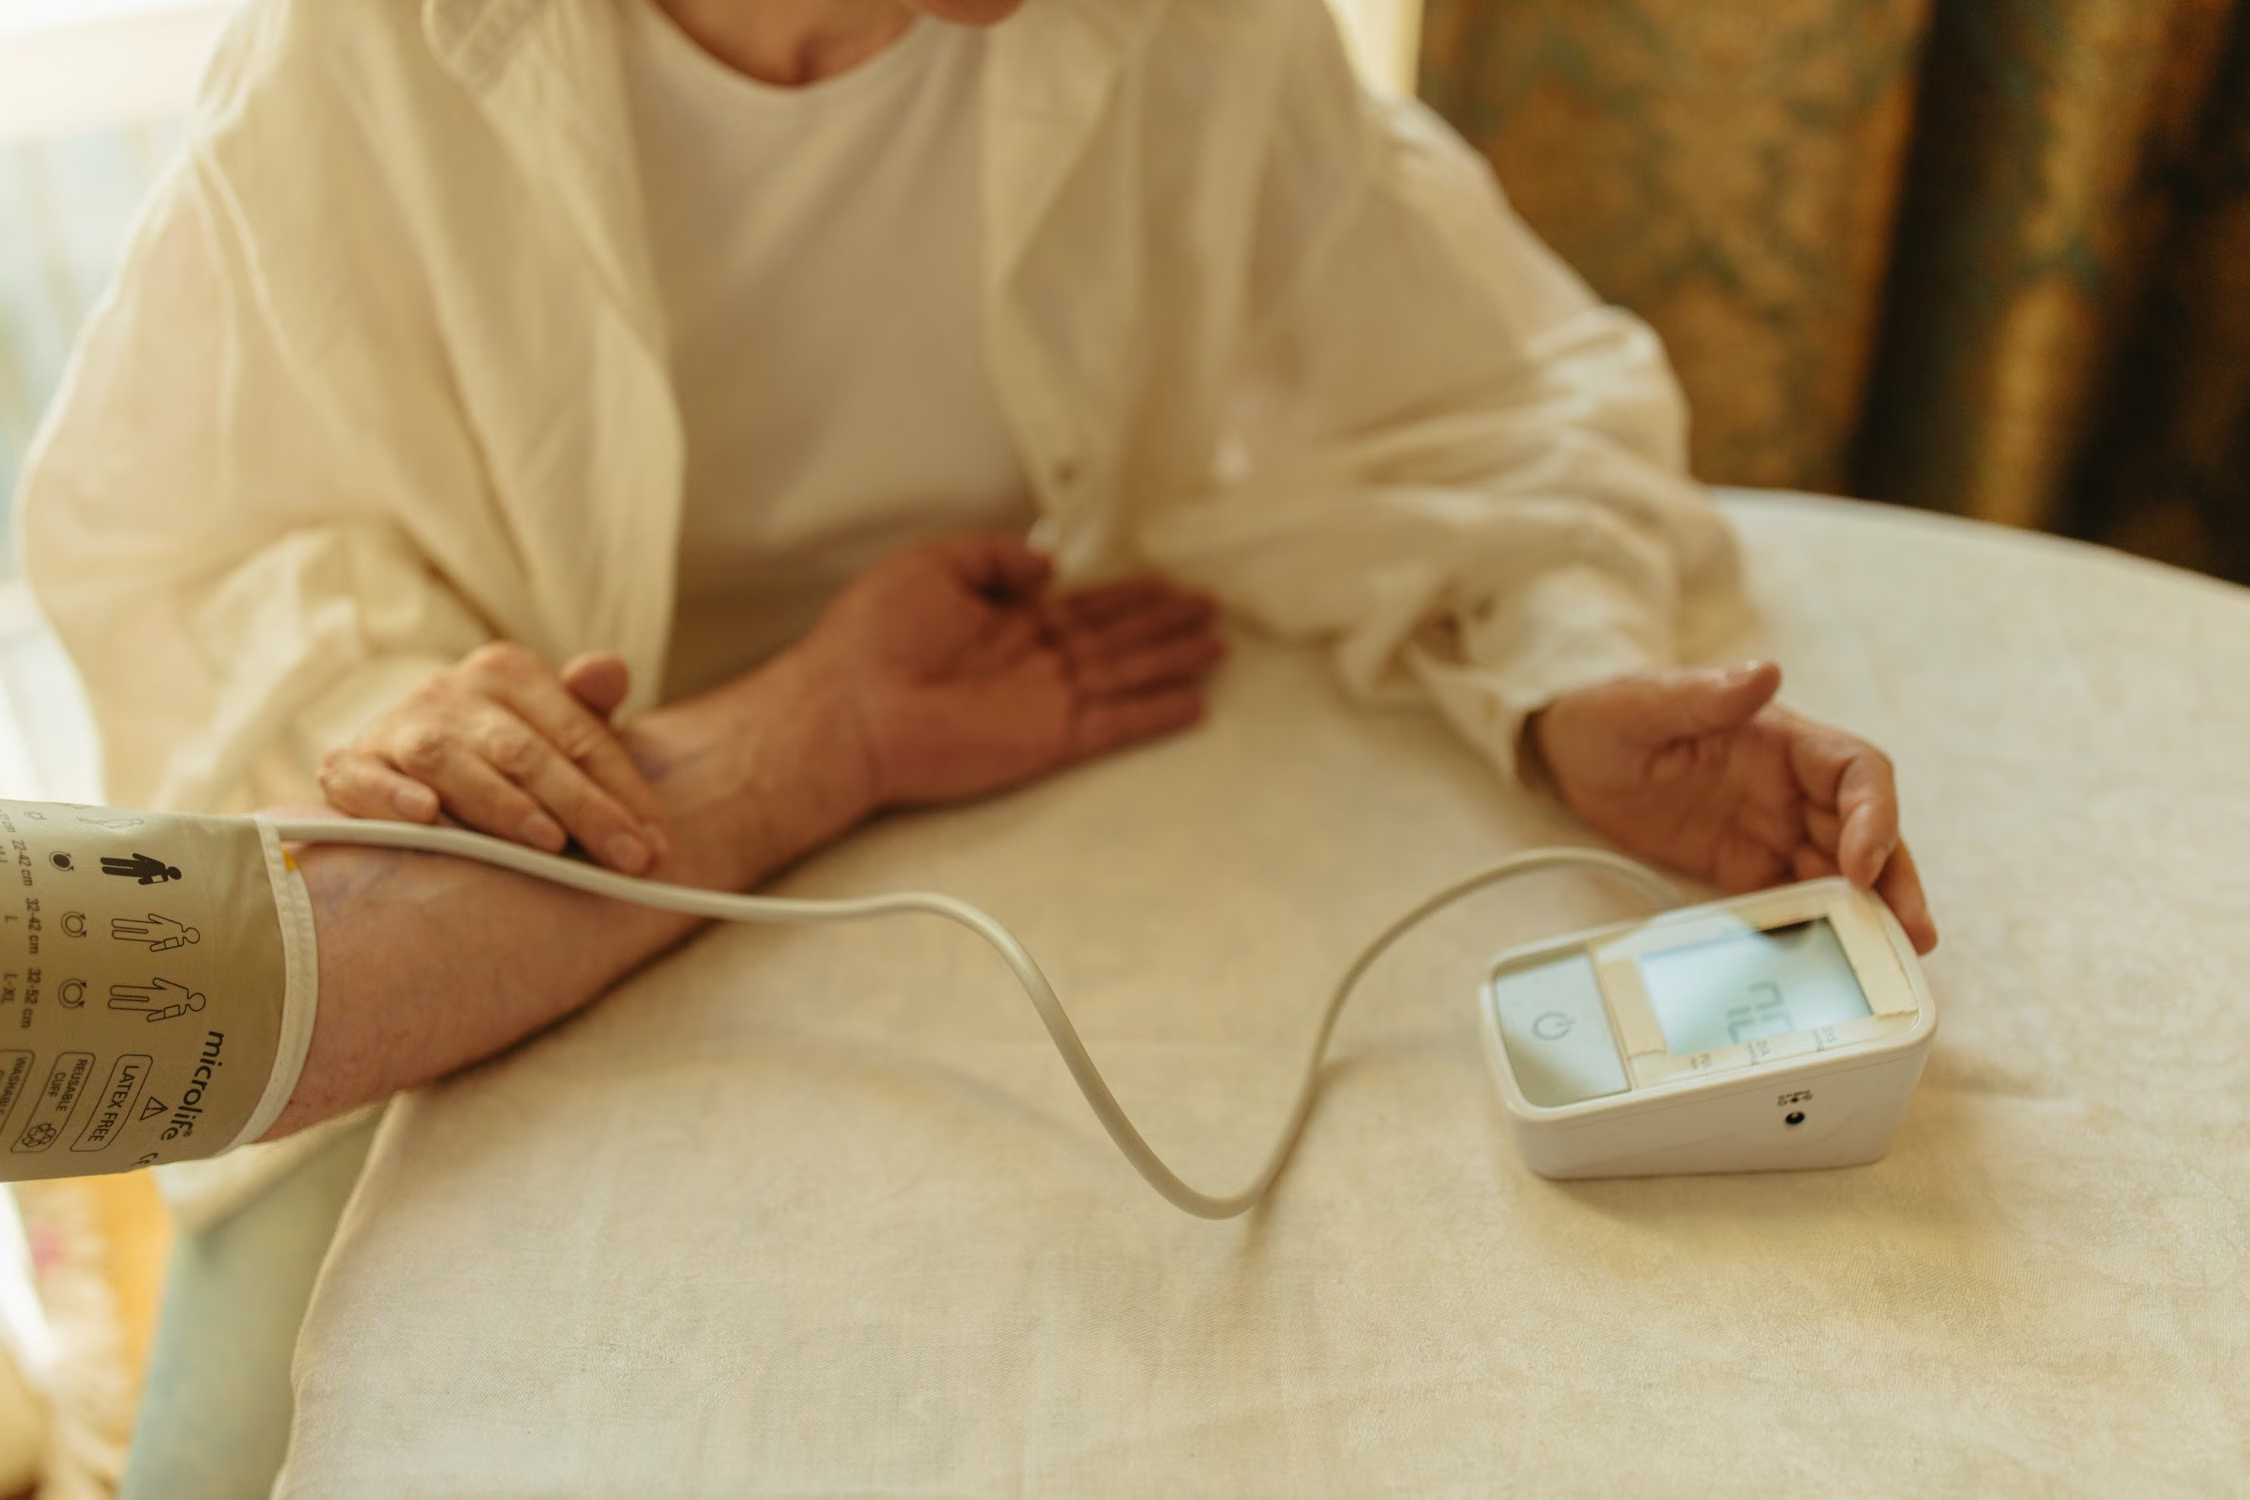
Learning how to measure blood pressure at home sounds simple enough. You wrap a cuff around your arm, press a button, wait for the machine to finish, and write down the numbers. That was essentially how I thought about home blood pressure monitoring at first. The more I looked into proper measurement technique, however, the more I realized that getting a meaningful blood pressure reading involves much more than simply owning a monitor.
Small details can influence a reading. The type of monitor matters. Cuff size matters. The way I sit matters. Whether my back and arm are supported matters. Talking during the measurement, crossing my legs, placing the cuff over clothing, exercising shortly before checking, or measuring immediately after rushing around can all make the result less representative of my true resting blood pressure. The Centers for Disease Control and Prevention and American Heart Association both emphasize standardized positioning and preparation because accurate technique gives a much clearer picture of cardiovascular health.
That is why I no longer think of home blood pressure monitoring as a quick button press. I treat it as a short routine. Once that routine becomes familiar, it takes very little effort, and the numbers become far more useful.
In this guide, I want to walk through exactly how I approach measuring blood pressure at home, from choosing the right monitor and preparing for a reading to positioning the cuff, taking multiple measurements, recording results, understanding the numbers, and recognizing situations that deserve medical attention.
Why I Think Home Blood Pressure Monitoring Is So Valuable
One reason I like home blood pressure monitoring is that blood pressure is not a completely fixed number. It naturally changes throughout the day in response to activity, stress, sleep, meals, medications, caffeine, exercise, emotions, and many other factors. A measurement taken during one brief appointment therefore provides useful information, but it does not necessarily tell the entire story.
Home monitoring allows measurements to be collected repeatedly under relatively consistent conditions. Instead of depending on one isolated result, I can look at the pattern that develops over several days.
This is one reason modern hypertension guidance places substantial value on home blood pressure monitoring. The 2025 American Heart Association and American College of Cardiology guideline emphasizes home monitoring as part of confirming high blood pressure, following treatment progress, and helping clinicians manage blood pressure over time.
Home readings can also provide information that office measurements sometimes miss. Some people become anxious in medical environments and record higher blood pressure there than they usually have elsewhere, a phenomenon commonly referred to as white-coat hypertension. The opposite can also occur, where office readings appear acceptable but blood pressure is elevated outside the clinic. Repeated measurements away from the medical setting can therefore give a clinician valuable additional context.
I still consider one point especially important: home monitoring does not replace professional medical care. I would not use a few reassuring readings as a reason to stop prescribed medication or skip follow-up appointments. The American Heart Association specifically advises people not to stop blood pressure medication based on home readings without discussing the change with their healthcare professional.
For me, home blood pressure monitoring works best as information that complements medical care rather than substitutes for it.
Before Measuring Anything, I Start With the Right Monitor
If I am trying to learn how to measure blood pressure at home accurately, the equipment is the first place I pay attention.
The American Heart Association recommends an automatic upper-arm cuff blood pressure monitor for home use. Upper-arm monitors are generally preferred over finger and wrist devices because positioning errors and other limitations can make finger or wrist measurements less reliable.
That distinction matters because the home-monitor market is enormous. It is easy to choose a device because it looks modern, connects to a smartphone, has thousands of online reviews, or comes from a familiar brand. None of those things automatically proves that the device measures blood pressure accurately.
I prefer to look for a monitor that has undergone recognized validation testing. ValidateBP, a U.S. validated-device listing supported by the American Medical Association, provides a searchable resource containing blood pressure monitors that have met its clinical accuracy criteria through an independent review process.
This is one of the most practical lessons I have taken from researching home monitoring: a blood pressure machine does not become trustworthy merely because it can display a systolic and diastolic number.
Accuracy should come first.
Cuff Size Is More Important Than Many People Realize
The monitor itself is only part of the equation. The cuff also needs to fit the arm properly.
I think cuff size is one of the easiest details to overlook because many home monitors arrive with one standard cuff in the box. It is tempting to assume that if the cuff physically goes around the arm, it must be the right size. That is not necessarily true.
Manufacturers typically specify the arm-circumference range appropriate for each cuff. I check that range and compare it with the circumference of the upper arm rather than guessing from body size.
If someone has particularly small or large arms, I would pay even closer attention to this issue. Some validated monitors support different cuff sizes, while others use a wide-range cuff designed to accommodate a broader range of arm circumferences.
I also like the American Heart Association’s practical recommendation of bringing a home monitor to a healthcare appointment. A healthcare professional can help determine whether the cuff fits correctly and can compare the home device with equipment used in the office.
That simple comparison can provide reassurance that both the monitor and the way it is being used are appropriate.
How I Prepare Before Taking My Blood Pressure
Good blood pressure measurement starts before the cuff ever inflates.
If I want a resting blood pressure reading, I do not check it immediately after running up stairs, finishing a workout, carrying groceries into the house, rushing through a stressful phone call, or doing anything else that has temporarily increased cardiovascular activity.
Current guidance recommends avoiding factors that can interfere with an accurate resting measurement. The CDC advises against eating or drinking during the 30 minutes before a reading, while NHLBI guidance specifically advises avoiding exercise, coffee, and cigarette smoking for at least 30 minutes beforehand.
I also use the bathroom first whenever necessary. A full bladder is another easily overlooked factor when trying to standardize a measurement, and both CDC and NHLBI guidance recommend emptying the bladder before checking blood pressure.
Once I am ready, I sit quietly for approximately five minutes.
I do not use those five minutes to answer emails, scroll rapidly through social media, argue with someone on the phone, or catch up on stressful news. The idea is to give my body time to settle into a resting state.
That short resting period may feel unnecessary when I am in a hurry, but it is part of the measurement rather than wasted time. If the goal is to understand resting blood pressure, the body needs an opportunity to actually reach a resting condition before the machine starts measuring it.
The Sitting Position I Use for a More Accurate Reading
My next priority is body position.
I sit in a proper chair rather than balancing on the edge of a bed or sitting on a stool without back support. My back rests against the chair, both feet stay flat on the floor, and I keep my legs uncrossed.
I then support the arm I am measuring on a table or another stable surface so that the cuff is approximately at heart level.
This positioning is consistently emphasized in blood pressure measurement recommendations. The CDC describes correct technique as sitting with the back supported, feet flat on the ground, legs uncrossed, and the arm resting at chest or heart height. NHLBI provides essentially the same advice.
I also remain quiet.
That means I do not talk while the machine is inflating or measuring. I do not answer questions from someone sitting nearby, and I do not treat blood pressure measurement as an opportunity for conversation.
It may feel overly precise, but that precision is exactly what makes readings from one day comparable with readings from another.
I Never Put the Blood Pressure Cuff Over Clothing
Another habit I follow closely is putting the cuff directly against bare skin.
I do not measure blood pressure through a sweatshirt, shirt sleeve, jacket, or other layer of clothing. The CDC specifically advises placing the cuff against bare skin rather than over clothing.
If I am wearing something with tight sleeves, I also try to avoid aggressively rolling the sleeve into a thick band around the upper arm. Instead, whenever practical, I wear clothing that makes the upper arm easy to expose.
Once the arm is uncovered, I place the cuff around the upper arm according to the monitor manufacturer’s instructions. Different cuffs have slightly different alignment markings, so I follow the supplied directions rather than assuming every monitor is identical.
The cuff should be secure enough to stay properly positioned but not applied in a way that feels excessively tight before inflation.
Most automatic monitors make the rest of the process straightforward. Once everything is positioned correctly, I start the machine, stay still, remain quiet, and allow the cuff to inflate and deflate without interfering with it.
How to Measure Blood Pressure at Home Step by Step
When I put the whole routine together, my approach is deliberately consistent.
I first choose a quiet location and make sure I have not just exercised, consumed caffeine, smoked, eaten a meal, or rushed through something physically demanding. I empty my bladder if necessary and sit quietly for at least five minutes.
Next, I sit with my back supported, both feet flat on the floor and my legs uncrossed. I expose my upper arm, apply the properly sized cuff directly against the skin, and support my arm so the cuff is approximately level with my heart.
I then start the automatic monitor and remain completely still and quiet while it takes the reading.
After the first measurement is complete, I write down the systolic pressure, diastolic pressure, and pulse if I am keeping a detailed log. I wait approximately one minute and take another measurement instead of relying entirely on the first number.
This repeat-measurement approach is supported by both CDC and American Medical Association materials. CDC blood pressure logging guidance recommends taking at least two readings one or two minutes apart, while AMA self-measured blood pressure guidance commonly recommends two measurements separated by roughly one minute.
The entire process takes only a few extra minutes once it becomes routine, yet the quality of the information is far better than what I would get from randomly checking my pressure whenever I happen to notice the monitor sitting nearby.
Why I Prefer Two Readings Instead of One
Blood pressure readings can vary even when they are taken only a short time apart.
For that reason, I do not become overly attached to a single measurement. If the first reading looks surprisingly high or low, I stay seated, remain calm, wait about a minute, and repeat it.
Taking two readings gives me more context.
The American Medical Association describes protocols in which people take two readings one to two minutes apart in both the morning and evening. The American Heart Association also provides home-monitoring materials recommending two readings separated by about one minute.
This is especially useful psychologically. If I saw one unexpectedly high number and immediately reacted to it, that anxiety itself could affect subsequent measurements.
I would rather collect several properly performed readings and look for a pattern.
Blood pressure management is generally about trends and repeated measurements, not emotional reactions to one isolated number.
When I Take My Blood Pressure During the Day
Consistency is more important to me than finding one supposedly perfect clock time.
If a healthcare professional has given specific instructions, I would follow those first. Medication timing, pregnancy, recent treatment changes, kidney disease, cardiovascular conditions, or other individual circumstances may influence when someone is asked to measure.
For routine self-monitoring, however, morning and evening measurements are commonly used. The American Medical Association describes an approach involving two readings in the morning and two in the evening, generally separated by one to two minutes, over a period of seven consecutive days.
The American Heart Association’s blood pressure log similarly describes checking for at least three days and preferably seven days, taking two measurements about one minute apart twice daily.
What I would not do is take twenty readings during one anxious afternoon and then ignore my blood pressure for the next month. More measurements do not automatically mean better information when the testing conditions are inconsistent.
A structured schedule is generally much easier to interpret.
I Keep a Blood Pressure Log Instead of Trusting My Memory
Unless the monitor automatically stores readings accurately by date and time, I like keeping a written or digital log.
At minimum, I record the date, time, systolic pressure and diastolic pressure. If something unusual happened that could affect the result, I make a short note about that too.
For example, a reading taken after an unusually stressful event may deserve context. The same applies if I slept poorly, changed medication timing under medical supervision, experienced symptoms, or accidentally took a reading without following my normal routine.
A home blood pressure log becomes especially valuable when it is shared with a healthcare professional.
Instead of saying, “My blood pressure is usually okay,” I can provide actual measurements collected under reasonably standardized conditions. That gives the clinician something far more useful to evaluate.
CDC materials encourage recording home measurements, and structured home-monitoring protocols commonly use the average of multiple readings rather than basing decisions on one isolated result.
This is why I think of my blood pressure monitor less as a warning device and more as a data-collection tool.
Understanding the Top and Bottom Blood Pressure Numbers
A blood pressure reading contains two numbers, and understanding the difference makes the result much less confusing.
The systolic blood pressure is the upper or first number. It represents the pressure exerted against artery walls when the heart contracts and pumps blood.
The diastolic blood pressure is the lower or second number. It represents the pressure against artery walls while the heart relaxes between beats.
So, if a monitor displays 118/76 mm Hg, 118 is the systolic measurement and 76 is the diastolic measurement.
The unit “mm Hg” means millimeters of mercury, the traditional unit used for blood pressure.
I find that understanding those basics makes the numbers feel less abstract. Rather than seeing a mysterious fraction-like result, I know that I am looking at two different phases of pressure within the circulatory system.
What Blood Pressure Numbers Mean Under Current U.S. Guidelines
When discussing categories, I think it is important to be specific about which guideline is being used. Different international organizations can use somewhat different definitions and treatment thresholds.
Under the current American Heart Association and American College of Cardiology classification retained in the 2025 U.S. guideline, normal blood pressure is below 120 mm Hg systolic and below 80 mm Hg diastolic.
Elevated blood pressure is systolic pressure between 120 and 129 while diastolic pressure remains below 80.
Stage 1 hypertension is systolic pressure from 130 to 139 or diastolic pressure from 80 to 89.
Stage 2 hypertension is systolic pressure of 140 or higher or diastolic pressure of 90 or higher.
Those categories are useful for understanding the general meaning of a reading, but I would not diagnose myself from a single home measurement.
Blood pressure diagnosis and treatment decisions require broader context, repeated measurements, medical history, cardiovascular risk, medications, other health conditions and professional judgment.
This is especially important because current guidelines increasingly emphasize individualized cardiovascular risk when determining how aggressively high blood pressure should be treated.
What I Do When One Reading Is Unexpectedly High
Seeing an unexpectedly high blood pressure number can be unsettling.
My first reaction would not be to panic. I would check whether I actually followed good technique.
Was I sitting quietly for five minutes? Had I just walked up the stairs? Was I talking? Were my feet flat? Was my arm supported at heart level? Was the cuff positioned properly? Had I recently consumed caffeine or exercised?
Then I would remain seated and repeat the measurement.
The American Heart Association notes that a single high reading is not automatically an immediate cause for alarm and recommends taking another measurement and recording both results.
Repeated high readings, however, are different from one unusual reading. If I were consistently seeing results above the range my healthcare professional expected, I would contact them rather than continuing to monitor indefinitely without guidance.
Home monitoring should help me communicate with medical professionals earlier, not give me a reason to postpone that conversation.
When Very High Blood Pressure May Be an Emergency
There is one situation where I would take the numbers much more seriously.
According to the American Heart Association, if blood pressure is higher than 180/120 mm Hg, the recommendation is to wait at least one minute and measure again.
If the second reading remains above 180/120 but there are no concerning symptoms, the AHA advises contacting a healthcare professional promptly because this can represent severe hypertension.
If blood pressure remains above 180/120 and symptoms such as chest pain, shortness of breath, back pain, numbness, weakness, vision changes or difficulty speaking are present, the American Heart Association treats this as a hypertensive emergency and advises calling emergency medical services.
I would never try to manage a situation like that simply by sitting beside the monitor and repeatedly checking the number.
Symptoms matter, and severe blood pressure elevation accompanied by signs of possible organ involvement requires urgent medical evaluation.
Common Home Blood Pressure Mistakes I Try to Avoid
The biggest lesson I have learned about how to measure blood pressure at home is that many inaccurate readings come from ordinary habits rather than faulty equipment.
One common mistake is measuring immediately after physical activity. Another is checking while standing, sitting without back support or crossing the legs. Allowing the arm to hang unsupported can also interfere with standardized positioning.
Talking during measurement is another surprisingly easy mistake. People sometimes treat the procedure casually and continue a conversation while the cuff is inflating. I stay quiet until the reading is finished.
Putting the cuff over clothing is another habit I avoid.
I also try not to become obsessed with retesting. If a reading surprises me, taking a second properly performed measurement is reasonable. Taking readings every two minutes for the next hour because I am anxious about the first one usually creates more confusion than useful information unless a healthcare professional has specifically instructed that kind of monitoring.
Finally, I avoid changing medication based solely on home numbers. Blood pressure can move in both directions for many reasons, and medication decisions belong in a conversation with the prescribing clinician. The AHA specifically warns against stopping blood pressure medication without professional guidance even when home readings look good.
Why Smartwatches and Cuffless Devices Do Not Replace My Arm Cuff
Wearable health technology is advancing quickly, and I understand why cuffless blood pressure features are attractive. A smartwatch is convenient, always available and much easier to use than wrapping an inflatable cuff around the arm.
For routine medical decision-making, though, I would not automatically treat a smartwatch blood pressure estimate as interchangeable with a validated upper-arm monitor.
The 2025 AHA/ACC hypertension guideline specifically cautions against relying on cuffless devices, including smartwatches, for accurate blood pressure measurement until these technologies demonstrate greater precision and reliability.
That does not mean wearable technology has no future in blood pressure monitoring. It means that convenience and medical validation are not the same thing.
For now, when I want numbers that I intend to discuss with a clinician, I prefer a validated automatic upper-arm cuff.
What I Would Do After Buying a New Home Monitor
Whenever possible, I would bring a newly purchased blood pressure monitor to a healthcare appointment.
I would take the device, cuff and instructions with me and ask whether the cuff size looks appropriate and whether my measuring technique is correct.
The AHA recommends bringing home monitors to appointments so healthcare professionals can help verify accuracy and technique, including periodically checking the device against office equipment.
I think this is especially worthwhile because an accurate device can still produce poor information when used incorrectly.
A clinician or nurse watching one measurement may immediately notice something I have missed: perhaps my arm is too low, the cuff is positioned incorrectly or the chair I normally use does not support my posture well.
Five minutes of technique correction can improve hundreds of future measurements.
How I Make Home Blood Pressure Monitoring a Sustainable Habit
The best monitoring routine is one I can realistically follow.
I keep the monitor somewhere accessible rather than burying it in the back of a cabinet. I use the same chair and table whenever possible, which naturally improves consistency because my posture and arm position are easier to reproduce.
I also try to measure at roughly comparable times when I am following a multi-day schedule.
What I avoid is turning blood pressure measurement into a source of constant anxiety.
There is an important difference between useful monitoring and compulsive checking. If a doctor asks for morning and evening readings for seven days, collecting those readings makes sense. Checking every few minutes because I am worried about small fluctuations does not automatically provide better medical information.
Blood pressure naturally varies.
The goal is not to force every reading to be identical. The goal is to collect enough high-quality measurements to understand the underlying pattern.
A Practical Example of My Home Measurement Routine
Imagine I want to collect a week of blood pressure measurements before an appointment.
In the morning, I would choose a consistent time when I can sit quietly without rushing. I would avoid caffeine, exercise and other activities that could temporarily interfere with the measurement beforehand. I would empty my bladder if needed and sit in my usual chair.
For five minutes, I would simply rest.
Then I would place the cuff on my bare upper arm, support that arm on the table at heart level, keep both feet flat on the floor, keep my legs uncrossed and remain silent.
I would take the first reading and record it.
After about one minute, while remaining seated and relaxed, I would take the second measurement and record that one too.
I would repeat a similar routine in the evening.
At the end of the monitoring period, I would have a useful set of readings rather than one random number. The AMA describes seven days of twice-daily monitoring with two readings each time as an optimal self-measured blood pressure protocol, although the exact schedule should ultimately match the instructions provided by the person’s healthcare team.
That is the kind of information I would feel confident bringing to a medical appointment.
When I Would Talk to a Healthcare Professional About My Readings
I would contact a healthcare professional if home readings repeatedly fall outside the range they have told me to expect, particularly if the pattern continues across multiple properly performed measurements.
I would also speak with them if blood pressure begins changing substantially after a medication adjustment, if I repeatedly experience unusually low readings together with symptoms such as dizziness or fainting, or if I simply cannot obtain consistent measurements despite correcting my technique.
Pregnancy deserves particular caution as well. Blood pressure management during pregnancy and the postpartum period has specific clinical considerations, and the 2025 hypertension guideline contains dedicated recommendations for pregnancy-related blood pressure management.
The same principle applies to children, people with certain heart rhythm problems and individuals with complex medical conditions. A standard home monitor or general adult interpretation may not always be appropriate.
That is why I see home monitoring as a partnership.
I collect the measurements. The healthcare professional helps interpret what those measurements mean in the context of the entire person.
My Final Thoughts on How to Measure Blood Pressure at Home
If there is one thing I would want someone to remember from this guide, it is that good blood pressure monitoring is about consistency, not simply frequency.
I can own the most expensive monitor available and still collect questionable numbers if I use the wrong cuff, measure over clothing, sit without support, talk during readings, cross my legs or check immediately after physical activity.
On the other hand, the routine itself is remarkably simple once I practice it.
I use a validated automatic upper-arm monitor with an appropriately sized cuff. I avoid common interfering factors before measuring. I empty my bladder, sit quietly for about five minutes, support my back, keep my feet flat and uncrossed, support my arm at heart level and place the cuff on bare skin.
Then I remain still and quiet while the monitor does its job.
I take at least two measurements about a minute apart when I am performing structured home monitoring, record the readings, and pay attention to the overall pattern rather than becoming anxious about every small fluctuation.
Most importantly, I use the information to improve conversations with healthcare professionals rather than trying to replace professional medical care.
That, to me, is the real value of learning how to measure blood pressure at home. It turns a small machine on the kitchen table into a practical way of understanding what is happening between medical appointments. When the equipment is reliable and the technique is consistent, home readings can provide useful information about cardiovascular health and help people participate more actively in managing their blood pressure.
References
1. American Heart Association — “Home Blood Pressure Monitoring.” This resource explains recommended monitor types, proper home monitoring technique, cuff considerations and the importance of validated upper-arm devices. Read the American Heart Association article.
2. Centers for Disease Control and Prevention — “Measuring Your Blood Pressure.” This CDC guide covers preparation, seated positioning, proper arm support, cuff placement and other steps needed for accurate blood pressure measurement. Read the CDC article.
3. National Heart, Lung, and Blood Institute — “Self-Measured Blood Pressure Fact Sheet.” This NHLBI/NIH resource provides practical patient guidance for monitoring blood pressure outside the doctor’s office. Read the NHLBI resource.
4. National Heart, Lung, and Blood Institute — “High Blood Pressure: Diagnosis.” This NIH resource explains preparation for accurate blood pressure testing, including resting, avoiding exercise and coffee beforehand, emptying the bladder and maintaining correct positioning. Read the NHLBI article.
5. American Heart Association — “Understanding Blood Pressure Readings.” This resource explains systolic and diastolic blood pressure, current blood pressure categories and what to do when blood pressure reaches severely elevated levels. Read the American Heart Association article.
6. American Heart Association — “Top 10 Things to Know About the AHA/ACC High Blood Pressure Guideline.” This patient-oriented resource summarizes the current U.S. blood pressure categories and key recommendations from the updated guideline. Read the American Heart Association resource.
7. American Heart Association Professional Heart Daily — “2025 High Blood Pressure Guideline.” This page provides the updated evidence-based guideline for preventing, detecting, evaluating and managing high blood pressure in adults. Read the 2025 guideline overview.
8. American Medical Association — “What You Need to Know About Self-Measured Blood Pressure Monitoring.” This resource discusses structured home blood pressure monitoring, including repeated morning and evening measurements and averaging results. Read the AMA article.
9. American Medical Association — “Follow This 7-Step Guide on Self-Measured Blood Pressure Monitoring.” This article describes a structured seven-day home monitoring protocol using morning and evening measurements. Read the AMA article.
10. ValidateBP — “U.S. Blood Pressure Validated Device Listing.” This resource, established with support from the American Medical Association, helps consumers and healthcare professionals identify blood pressure devices that have undergone independent review for clinical accuracy. Visit ValidateBP.
11. American Heart Association — “The Rules for Measuring Blood Pressure — and Why They Exist.” This article explains why details such as chair support, foot position, arm position and correct cuff placement matter when obtaining blood pressure readings. Read the American Heart Association article.
12. Kario K., et al. — “Home Blood Pressure Monitoring: Current Status and New Developments.” This peer-reviewed review discusses the clinical role, reliability and value of home blood pressure monitoring in hypertension diagnosis and management. Read the article through PubMed Central.
Medical Disclaimer
This article is provided for general educational and informational purposes only and is not intended to diagnose, treat, cure or prevent any medical condition. It should not be considered a substitute for individualized advice, examination, diagnosis or treatment from a qualified physician or other licensed healthcare professional.
Blood pressure targets, monitoring schedules and treatment decisions can differ according to age, pregnancy, medications, cardiovascular risk, kidney disease, diabetes, existing medical conditions and other individual factors. Do not start, stop or change prescribed blood pressure medication based solely on information in this article or on individual home readings without consulting your healthcare professional.
If a blood pressure reading is higher than 180/120 mm Hg, repeat the measurement after at least one minute as recommended by the American Heart Association. If it remains that high and you have symptoms such as chest pain, shortness of breath, weakness, numbness, difficulty speaking, vision changes, back pain or other new and concerning symptoms, seek emergency medical care immediately.